1. UIViewControllerを継承したPickerViewControllerクラスを作成する
PickerViewController.h
PickerViewController.m
2. AppDelegateクラスを修正し、PickerViewControllerに遷移するようにする。
AppDelegate.m
#import "AppDelegate.h"
#import "PickerViewController.h"

@implementation AppDelegate

- (BOOL)application:(UIApplication *)application didFinishLaunchingWithOptions:(NSDictionary *)launchOptions
{
    self.window = [[UIWindow alloc] initWithFrame:[[UIScreen mainScreen] bounds]];
    [self.window makeKeyAndVisible];

    self.window.rootViewController = [[PickerViewController alloc] init];
    return YES;
}

// snip
3. ヘッダファイルにUIPickerViewDelegateとUIPickerViewDataSourceプロトコルを追加する。
PickerViewController.h
@interface PickerViewController : UIViewController <UIPickerViewDelegate, UIPickerViewDataSource>
4. デリゲートメソッドを実装する
UIPickerViewDataSource#numberOfComponentsInPickerView:UIPickerViewDataSource#pickerView:numberOfRowsInComponent:UIPickerViewDelegate#pickerView:titleForRow:forComponent:
の3つのメソッドを実装する。
UIPickerView では複数列を扱うことができるので3列で作ってみる。
PickerViewController.m
#import "PickerViewController.h"

@interface PickerViewController ()
@property(nonatomic, strong) UIPickerView *pickerView; // プロパティ追加
@end

// snip

- (void)viewDidLoad
{
    [super viewDidLoad];
    self.view.backgroundColor = [UIColor lightGrayColor];
    self.pickerView = [[UIPickerView alloc] init];
    self.pickerView.delegate = self;
    self.pickerView.dataSource = self;
    [self.view addSubview:self.pickerView];
}

{
    return 3; // 列数
}

- (NSInteger)pickerView:(UIPickerView *)pickerView numberOfRowsInComponent:(NSInteger)component
{
    return 10; // 各列の行数
}

- (NSString *)pickerView:(UIPickerView *)pickerView titleForRow:(NSInteger)row forComponent:(NSInteger)component
{
    // 各項目に行数(row)と列数(component)を表示する
    return [NSString stringWithFormat:@"行%d-列%d", row, component];
}
シミュレータで確認。

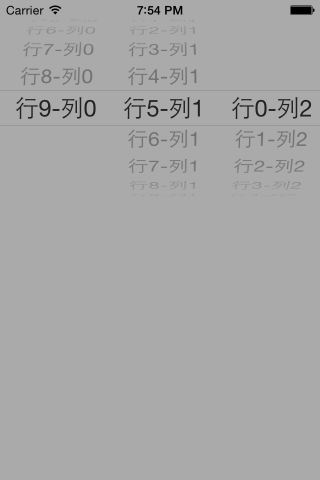
4. ピッカーを初期選択状態で表示する
UIPickerView のpickerView:didSelectRow:inComponent:メソッドを使う。
- (void)viewDidLoad
{
    [super viewDidLoad];
    self.view.backgroundColor = [UIColor lightGrayColor];

    self.pickerView = [[UIPickerView alloc] init];
    self.pickerView.delegate = self;
    self.pickerView.dataSource = self;

    // 初期選択状態を指定
    [self.pickerView selectRow:9 inComponent:0 animated:NO];
    [self.pickerView selectRow:5 inComponent:1 animated:NO];
    [self.pickerView selectRow:0 inComponent:2 animated:NO];

    [self.view addSubview:self.pickerView];
}
シミュレータで確認。

5. 選択行の情報取得
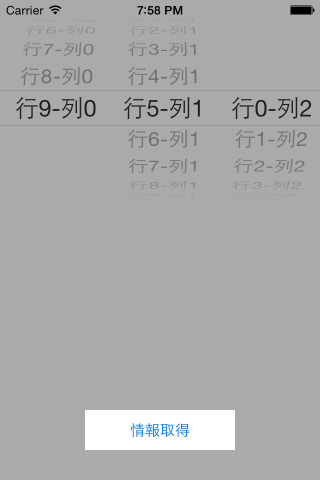
適当なボタンを用意し、タッチ時に選択行の情報をアラートビューで表示する。
UIPickerView のselectedRowInComponent:メソッドを使う。
- (void)viewDidLoad
{
    [super viewDidLoad];
    self.view.backgroundColor = [UIColor lightGrayColor];

    self.pickerView = [[UIPickerView alloc] init];
    self.pickerView.delegate = self;
    self.pickerView.dataSource = self;

    // 初期選択状態を指定
    [self.pickerView selectRow:9 inComponent:0 animated:NO];
    [self.pickerView selectRow:5 inComponent:1 animated:NO];
    [self.pickerView selectRow:0 inComponent:2 animated:NO];

    [self.view addSubview:self.pickerView];

    // ボタン
    UIButton *button = [UIButton buttonWithType:UIButtonTypeRoundedRect];
    button.backgroundColor = [UIColor whiteColor];
    [button setTitle:@"情報取得" forState:UIControlStateNormal];
    button.frame = CGRectMake(0, 0, 150, 40);
    button.center = CGPointMake(self.view.bounds.size.width / 2, self.view.bounds.size.height - 50);
    // ボタンがタッチアップされた時に`performButtonAction`メソッドを呼び出す
    [button addTarget:self action:@selector(performButtonAction) forControlEvents:UIControlEventTouchUpInside];
    [self.view addSubview:button];
}

- (NSInteger)numberOfComponentsInPickerView:(UIPickerView *)pickerView
{
    return 3; // 列数
}

- (NSInteger)pickerView:(UIPickerView *)pickerView numberOfRowsInComponent:(NSInteger)component
{
    return 10; // 各列の行数
}

- (NSString *)pickerView:(UIPickerView *)pickerView titleForRow:(NSInteger)row forComponent:(NSInteger)component
{
    // 各項目に行数(row)と列数(component)を表示する
    return [NSString stringWithFormat:@"行%d-列%d", row, component];
}

// 選択行の情報取得
- (void)performButtonAction
{
    // ピッカーの選択行を取得するには、UIPickerView の`selectedRowInComponent:`メソッドを使う。
    // 引数には選択行(row)の取得したい列(component)を指定する。
    NSInteger com0 = [self.pickerView selectedRowInComponent:0]; // 1列目
    NSInteger com1 = [self.pickerView selectedRowInComponent:1]; // 2列目
    NSInteger com2 = [self.pickerView selectedRowInComponent:2]; // 3列目

    NSString *message = [NSString stringWithFormat:@"%d - %d - %d", com0, com1, com2];
    UIAlertView *alert = [[UIAlertView alloc] init];
    alert.message = message;
    [alert addButtonWithTitle:@"OK"];
    [alert show];
}
シミュレータで確認。

ボタンをタップ。
