xyk blog

最近は iOS 開発の記事が多めです。

UIImage の画像を単色で塗りつぶす

検証環境:
Xcode 12.2
Swift 5.3.1

UIImage の画像を単色で塗りつぶす方法について。

元画像

f:id:xyk:20201120194710p:plain

変更後

f:id:xyk:20201121013317p:plain

UIImageView と一緒に使って変更する

UIImage を UIImageView にセットして一緒に使う場合は、UIImage のRenderingMode.alwaysTemplateの指定とUIImageView のtintColorの指定すれば実現できる。

let image = UIImage(named: "foo.png")!
imageView.image = image.withRenderingMode(.alwaysTemplate)
imageView.tintColor = .gray

UIImage 単体で変更する

UIImage 単体で変更したい場合は、ImageContext に元画像と単色画像をブレンドモードを使用して重ね合わせることで実現できる。
(例えばCALayer.contentsに直接セットするUIImage画像を単色にしたいケースなど)
以下2つどちらのやり方でも同様に変更できる。

  • CGBlendMode.destinationInを使う
func tintedImage(source: UIImage, color: UIColor) -> UIImage {
    UIGraphicsBeginImageContextWithOptions(source.size, false, source.scale)
    let rect = CGRect(origin: .zero, size: source.size)

    color.setFill()
    UIRectFill(rect) // 単色の背景画像として描画
    source.draw(in: rect, blendMode: .destinationIn, alpha: 1) // 元画像を前景画像として描画
    
    let resultImage = UIGraphicsGetImageFromCurrentImageContext()!
    UIGraphicsEndImageContext()
    return resultImage
}
  • CGBlendMode.destinationInを使う - UIGraphicsImageRenderer版 (iOS10以降)
func tintedImage(source: UIImage, color: UIColor) -> UIImage {
    return UIGraphicsImageRenderer(size: source.size).image { context in
        let rect = CGRect(origin: .zero, size: source.size)
        color.setFill()
        context.fill(rect) // 単色の背景画像として描画
        source.draw(in: rect, blendMode: .destinationIn, alpha: 1) // 元画像を前景画像として描画
    }
}
  • CGBlendMode.sourceInを使う
func tintedImage(source: UIImage, color: UIColor) -> UIImage {
    UIGraphicsBeginImageContextWithOptions(source.size, false, source.scale)
    let context = UIGraphicsGetCurrentContext()!
    let rect = CGRect(origin: .zero, size: source.size)
    
    source.draw(in: rect) // 元画像を背景画像として描画
    color.setFill()
    context.setBlendMode(.sourceIn)
    context.fill(rect)  // 単色の前景画像として描画
    
    let resultImage = UIGraphicsGetImageFromCurrentImageContext()!
    UIGraphicsEndImageContext()
    return resultImage
}
  • CGBlendMode.sourceInを使う - UIGraphicsImageRenderer版 (iOS10以降)
func tintedImage(source: UIImage, color: UIColor) -> UIImage {
    return UIGraphicsImageRenderer(size: source.size).image { context in
        let rect = CGRect(origin: .zero, size: source.size)
        source.draw(in: rect) // 元画像を背景画像として描画
        color.setFill()
        context.fill(rect, blendMode: .sourceIn)  // 単色の前景画像として描画
    }
}
  • 追記: ImageContext 内でRenderingMode.alwaysTemplateを使う。

コードが一番短く書ける。

extension UIImage {
    
    func tinted(with color: UIColor) -> UIImage {
        return UIGraphicsImageRenderer(size: size).image { _ in
            color.set()
            withRenderingMode(.alwaysTemplate).draw(at: .zero)
        }
    }
}

ブレンドモードについて

CGBlendModeAppleドキュメントはこちら
上の例で使った2つのブレンドモードの方程式は

  • CGBlendMode.destinationInR = D*Sa
  • CGBlendMode.sourceInR = S*Da

とのこと。
Rは Result、Sは Source、DDestinationaがアルファ値。

  • CGBlendMode.destinationIn はDとSの重なっている部分だけ表示、色はS
  • CGBlendMode.sourceInはSとDの重なっている部分だけ表示、色はD

になる。

以下のブレンド結果の画像例がわかりやすい。
元画像(赤の円)と混ぜ合わせる画像(青の正方形)をブレンドした例。

f:id:xyk:20201121004849p:plain

こちらの画像を引用。

Xcode 関連ファイルを定期的に削除する

検証環境:
Xcode 12.2
Swift 5.3.1

Xcode のキャッシュファイルなどの関連ファイルはかなりのディスクスペースを消費するので定期的に削除するほうがよい。

DerivedData

中間生成ファイル。アプリ単位でビルド時に作成される。
ビルドが突然できなくなった場合などこれを消すと解消する場合がある。

rm -rf ~/Library/Developer/Xcode/DerivedData/*

iOS DeviceSupport

XcodeiOS 実機端末との接続を認識したタイミングで作成される。
iOS バージョンをアップデートする度に新しいディレクリが増えていく。
全削除して問題なし。

$ l ~/Library/Developer/Xcode/iOS\ DeviceSupport/

13.5.1 (17F80)
13.6 (17G68)
13.6 (17G68) arm64e
13.6.1 (17G80) arm64e
14.0 (18A373)
14.0.1 (18A393)
14.0.1 (18A393) arm64e
14.1 (18A8395)
14.1 (18A8395) arm64e
14.2 (18B92)
$ du -sh ~/Library/Developer/Xcode/iOS\ DeviceSupport/*

3.9G    /Users/xyk/Library/Developer/Xcode/iOS DeviceSupport/14.2 (18B92) arm64e
...

1ディレクトリで数GB単位のサイズがあり、かなり大きいので Mac のバックアップする際などは事前に削除したほうがよい。

watchOS DeviceSupport

watchOS 用。
XcodeApple Watch とペアリングした iPhone との接続を認識したタイミングで作成される。
watchOS バージョンをアップデートする度に新しいディレクリが増えていく。

$ l ~/Library/Developer/Xcode/watchOS\ DeviceSupport/

Watch4,1 6.2.8 (17U63)
Watch4,1 7.0.1 (18R395)
Watch4,1 7.0.2 (18R402)
Watch4,1 7.1 (18R590)
$ du -sh ~/Library/Developer/Xcode/watchOS\ DeviceSupport/*

398M    /Users/xyk/Library/Developer/Xcode/watchOS DeviceSupport/Watch4,1 7.1 (18R590)
...

Archives

ipa 作成時に作成される。

$ l ~/Library/Developer/Xcode/Archives/

2020-10-01
2020-09-29

Xcode のキャッシュ

$ l ~/Library/Caches/com.apple.dt.Xcode/
Cache.db
Cache.db-shm
Cache.db-wal
CachedDesktopImageScaled.tif
WebKit
fsCachedData

あんまり大したサイズはなかった。

$ du -sh ~/Library/Caches/com.apple.dt.Xcode/
345M    /Users/xyk/Library/Caches/com.apple.dt.Xcode

CoreSimulator

以下ディレクトリに iPhone シミュレータのデバイスイメージとキャッシュがある。

~/Library/Developer/CoreSimulator/

シミュレータのデバイスイメージは 19GB、そして キャッシュは 9.5GB もあった。

$ du -sh ~/Library/Developer/CoreSimulator/*
9.5G    /Users/xyk/Library/Developer/CoreSimulator/Caches
 19G    /Users/xyk/Library/Developer/CoreSimulator/Devices
  0B    /Users/xyk/Library/Developer/CoreSimulator/Temp

まずシミュレータのキャッシュは全削除でOK。

$ rm -rf ~/Library/Developer/CoreSimulator/Caches/dyld/

もう一方はシミュレータのデバイスイメージの一覧。
ディレクトリ名は一意に表す UUID が割り振られている。

$  l ~/Library/Developer/CoreSimulator/Devices/

10D8C6FC-0616-4ADB-B8B9-28FC1FAFF147
1DFDFD00-B32E-4968-9D34-356825215C1C
...

UUID だと何のデバイスかわからないので以下コマンドで確認する。

$ xcrun simctl list

== Device Types ==
iPhone 4s (com.apple.CoreSimulator.SimDeviceType.iPhone-4s)
iPhone 5 (com.apple.CoreSimulator.SimDeviceType.iPhone-5)
...
== Runtimes ==
iOS 14.2 (14.2 - 18B79) - com.apple.CoreSimulator.SimRuntime.iOS-14-2
tvOS 14.2 (14.2 - 18K54) - com.apple.CoreSimulator.SimRuntime.tvOS-14-2
watchOS 7.1 (7.1 - 18R579) - com.apple.CoreSimulator.SimRuntime.watchOS-7-1
== Devices ==
-- iOS 14.2 --
    iPhone 8 (2F64CE34-5CB4-4D8D-89A6-264273ADCC8C) (Shutdown)
    iPhone 8 Plus (893579BF-2A02-4867-9618-9C4AD9362AD3) (Shutdown)
    iPhone 11 (10D8C6FC-0616-4ADB-B8B9-28FC1FAFF147) (Shutdown)
    iPhone 11 Pro (F9DBE081-2A95-4D26-AC2F-B3CF3A04B013) (Shutdown)
    iPhone 11 Pro Max (28877C6F-B924-4809-8A6F-27B83F6C626D) (Shutdown)
    iPhone SE (2nd generation) (6607972D-4214-465A-AC03-EC8CB0127F5C) (Shutdown)
    iPhone 12 mini (636AFC6D-0447-45D8-AE92-BA4ECAEED0CE) (Shutdown)
    iPhone 12 (42D55001-838C-47F0-8299-B727825342E0) (Shutdown)
    iPhone 12 Pro (B90B1372-2F0B-4B1B-84D0-F60CD8A57B23) (Shutdown)
    iPhone 12 Pro Max (5F5833BD-5322-40E5-9656-F22EDFA725CB) (Shutdown)
    iPod touch (7th generation) (EB469B62-58B2-43C4-9768-BAB84646D437) (Shutdown)
    iPad Pro (9.7-inch) (7E6911CC-975E-44E5-92C7-E7F811982F95) (Shutdown)
    iPad Pro (11-inch) (2nd generation) (AF3AF7C1-5BBE-4DDB-B2AC-BC1DF68EE2B1) (Shutdown)
    iPad Pro (12.9-inch) (4th generation) (E3994BDC-7347-4F09-B0A0-B9ECD4A0A23A) (Shutdown)
    iPad (8th generation) (8BB4C077-FF15-41F1-8C15-D71AB8218123) (Shutdown)
    iPad Air (4th generation) (1DFDFD00-B32E-4968-9D34-356825215C1C) (Shutdown)
-- tvOS 14.2 --
    Apple TV (1F6EB2FF-E90F-4CB7-AE83-1F76A12726C5) (Shutdown)
    Apple TV 4K (AA26C080-1DBD-4EC3-A256-EBF612CBCFF4) (Shutdown)
    Apple TV 4K (at 1080p) (C73C7065-8071-45E9-BF5D-925715F2A900) (Shutdown)
-- watchOS 7.1 --
    Apple Watch Series 5 - 40mm (8DE67E08-C034-4DBD-8B19-67B29072796E) (Shutdown)
    Apple Watch Series 5 - 44mm (FB015CC5-2505-43A0-8F5B-C541A58780B7) (Shutdown)
    Apple Watch Series 6 - 40mm (2CBBADB8-423E-4607-89A2-48ED718AB815) (Shutdown)
    Apple Watch Series 6 - 44mm (A986F090-F738-43EA-BD89-1CB9AE52A181) (Shutdown)
-- Unavailable: com.apple.CoreSimulator.SimRuntime.iOS-12-0 --
    iPhone 5s (7F7A3FDF-7A0F-4879-B686-D68ED321909D) (Shutdown) (unavailable, runtime profile not found)
    iPhone 6 Plus (BD92CC35-10DB-43BE-AE03-3061B6A4541E) (Shutdown) (unavailable, runtime profile not found)
    ...

この中の== Devices ==Unavailableとなっているものがあれば使えなくなった過去のデバイスイメージなので削除してOK。
個別に削除するのは面倒なので、一括で削除できるコマンドがあるのでそれを使用する。

$ xcrun simctl delete unavailable

削除後は 212MBとかなり削減できた。

$ du -sh ~/Library/Developer/CoreSimulator/*
9.5G    /Users/xyk/Library/Developer/CoreSimulator/Caches
212M    /Users/xyk/Library/Developer/CoreSimulator/Devices
  0B    /Users/xyk/Library/Developer/CoreSimulator/Temp

ちなみにデバイス一覧表示は以下コマンドでもできる。
こちらは有効なデバイスのみ表示される。
シミュレータはデバイスタイプ(例: iPhone 12)とOSバージョン(例: iOS14)の組み合わせ毎に作成される。

$ xcrun xctrace list devices

== Devices ==
...

== Simulators ==
Apple TV (14.2) (1F6EB2FF-E90F-4CB7-AE83-1F76A12726C5)
Apple TV 4K (14.2) (AA26C080-1DBD-4EC3-A256-EBF612CBCFF4)
Apple TV 4K (at 1080p) (14.2) (C73C7065-8071-45E9-BF5D-925715F2A900)
iPad (8th generation) (14.2) (8BB4C077-FF15-41F1-8C15-D71AB8218123)
iPad Air (4th generation) (14.2) (1DFDFD00-B32E-4968-9D34-356825215C1C)
iPad Pro (11-inch) (2nd generation) (14.2) (AF3AF7C1-5BBE-4DDB-B2AC-BC1DF68EE2B1)
iPad Pro (12.9-inch) (4th generation) (14.2) (E3994BDC-7347-4F09-B0A0-B9ECD4A0A23A)
iPad Pro (9.7-inch) (14.2) (7E6911CC-975E-44E5-92C7-E7F811982F95)
iPhone 11 (14.2) (10D8C6FC-0616-4ADB-B8B9-28FC1FAFF147)
iPhone 11 Pro (14.2) (F9DBE081-2A95-4D26-AC2F-B3CF3A04B013)
iPhone 11 Pro Max (14.2) (28877C6F-B924-4809-8A6F-27B83F6C626D)
iPhone 12 (14.2) (42D55001-838C-47F0-8299-B727825342E0)
iPhone 12 (14.2) + Apple Watch Series 5 - 44mm (7.1) (FB015CC5-2505-43A0-8F5B-C541A58780B7)
iPhone 12 Pro (14.2) (B90B1372-2F0B-4B1B-84D0-F60CD8A57B23)
iPhone 12 Pro (14.2) + Apple Watch Series 6 - 40mm (7.1) (2CBBADB8-423E-4607-89A2-48ED718AB815)
iPhone 12 Pro Max (14.2) (5F5833BD-5322-40E5-9656-F22EDFA725CB)
iPhone 12 Pro Max (14.2) + Apple Watch Series 6 - 44mm (7.1) (A986F090-F738-43EA-BD89-1CB9AE52A181)
iPhone 12 mini (14.2) (636AFC6D-0447-45D8-AE92-BA4ECAEED0CE)
iPhone 12 mini (14.2) + Apple Watch Series 5 - 40mm (7.1) (8DE67E08-C034-4DBD-8B19-67B29072796E)
iPhone 8 (14.2) (2F64CE34-5CB4-4D8D-89A6-264273ADCC8C)
iPhone 8 Plus (14.2) (893579BF-2A02-4867-9618-9C4AD9362AD3)
iPhone SE (2nd generation) (14.2) (6607972D-4214-465A-AC03-EC8CB0127F5C)
iPod touch (7th generation) (14.2) (EB469B62-58B2-43C4-9768-BAB84646D437)

Xcode 上でシミュレータ一覧を確認するには
メニュー -> Window -> Devices and Simulators -> Simulatorsタブ
から。
ここからシミュレータを個別に削除したり新たに追加できたりする。

以下は以前書いたシミュレータ関連の記事。

xyk.hatenablog.com

xyk.hatenablog.com

Carthage のキャッシュ

Xcode とは関係ないが Carthage でライブラリ管理している場合。

$ du -sh /Users/xyk/Library/Caches/org.carthage.CarthageKit/DerivedData/*
4.8G    /Users/xyk/Library/Caches/org.carthage.CarthageKit/DerivedData/11.6_11E708
4.8G    /Users/xyk/Library/Caches/org.carthage.CarthageKit/DerivedData/11.7_11E801a
4.8G    /Users/xyk/Library/Caches/org.carthage.CarthageKit/DerivedData/12.0_12A7209
5.1G    /Users/xyk/Library/Caches/org.carthage.CarthageKit/DerivedData/12.2_12B45b
4.2G    /Users/xyk/Library/Caches/org.carthage.CarthageKit/DerivedData/12.4_12D4e

Xcode のバージョン毎にギガ単位サイズのキャッシュができている。
キャッシュサイズは使用するライブラリ数で変わってくるかと思う。
昔のバージョンのものは削除。

$ rm -rf /Users/xyk/Library/Caches/org.carthage.CarthageKit/DerivedData/11*

Carthage で The file couldn't be saved. Command PhaseScriptExecution failed with a nonzero exit code のエラー

検証環境:
Xcode 12.2
Swift 5.3.1

最近、Carthage でビルドをしていると以下のエラーが出てビルドできなくなる現象がちょくちょく発生していた。

The file couldn't be saved. 
Command PhaseScriptExecution failed with a nonzero exit code 

こちらの issue で同様の事象について報告されている。

github.com

こちらを参考にとりあえず解決したので手順をメモ。

まずコマンドライン
open $TMPDIR/TemporaryItems
を叩いて Finder でこのディレクトリを開く。
中に連番のディレクトリがたくさんあるのでこれらを全部削除したところ解決した。

(A Document Being Saved By carthage)
(A Document Being Saved By carthage 2)
(A Document Being Saved By carthage 3)
...

ちなみに Mac 再起動でも解消する。

マップ(MKMapView)上のある座標が円領域内に含まれるかどうかを判定する方法

検証環境:
Xcode 12
Swift 5.3

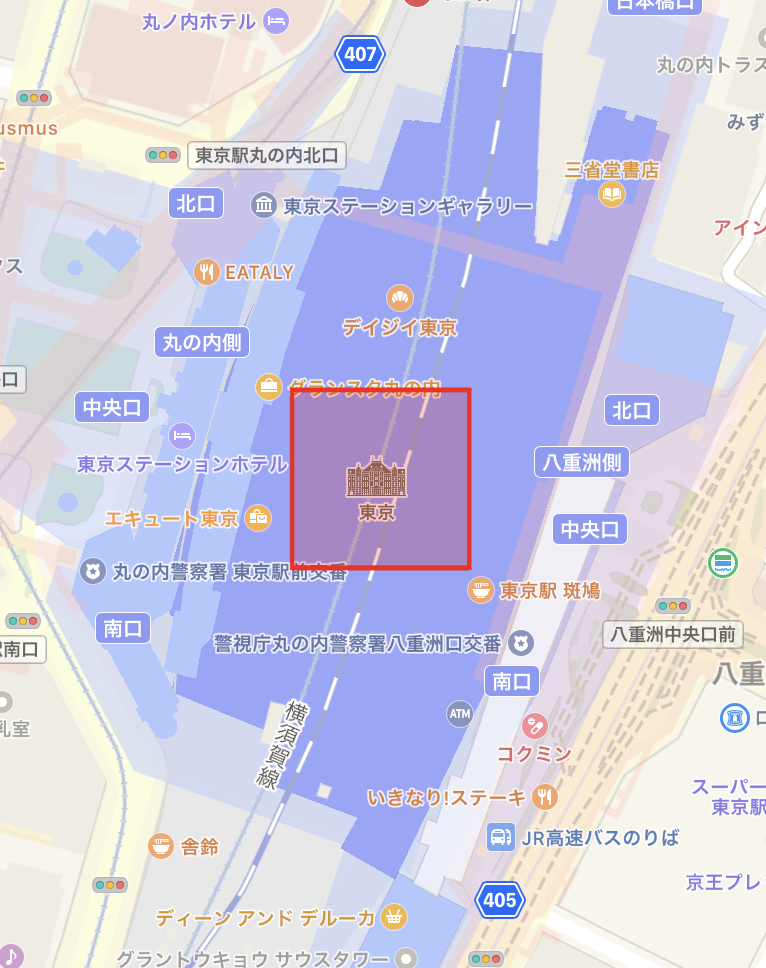
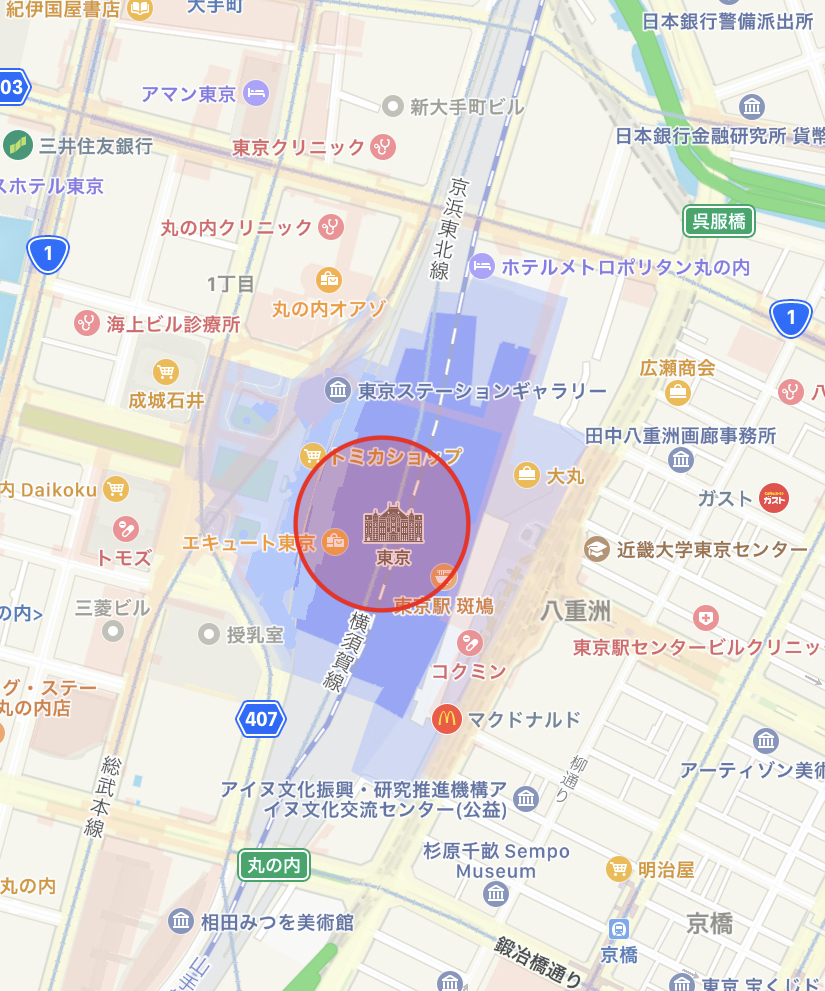
マップ(MKMapView)上のある座標が円領域内に含まれるかどうかを判定する方法。
CLCircularRegionを使うと簡単にできる。

import MapKit
// 対象の座標(CLLocationCoordinate2D)
let location = CLLocationCoordinate2D(latitude: latitude, longitude: longitude)

// 円の中心の緯度経度(CLLocationCoordinate2D)
let center = CLLocationCoordinate2D(latitude: 35.6809591, longitude: 139.7673068)
// 半径のメートル指定
let radius: CLLocationDistance = 100
let circularRegion = CLCircularRegion(center: center, radius: radius, identifier: "identifier")
if circularRegion.contains(location) {
    // 含まれる
}

例えばマップ上に複数のアノテーションが密集していて、選択したアノテーションの半径10m以内にある別のアノテーションを検出したい場合のサンプル

extension ViewController: MKMapViewDelegate {

    // アノテーションビューの1つが選択された時に呼ばれるデリゲート
    func mapView(_ mapView: MKMapView, didSelect view: MKAnnotationView) {
        
        if let selectedCoordinate = view.annotation?.coordinate {
            for annotation in mapView.annotations where annotation.coordinate != selectedCoordinate {
                let circularRegion = CLCircularRegion(center: selectedCoordinate, radius: 10, identifier: "identifier")
                if circularRegion.contains(annotation.coordinate) {
                    print("半径10m以内にある別のアノテーション")
                }
            }
        }
    }   
}

直近の記事で MKMapRectMKCoordinateRegionMKCircleMKPolygonを使って判定する方法も書いた。

xyk.hatenablog.com

xyk.hatenablog.com

マップ上に追加した MKCircle やMKPolygon などの領域内にある座標かどうかを判定する方法

検証環境:
Xcode 12
Swift 5.3

マップ(MKMapView)上にオーバーレイしたMKCircleMKPolygonなどの領域内にある座標かどうかを判定する方法。
座標の緯度経度はCLLocationCoordinate2Dで扱っているとする。

マップ上に MKCircle や MKPolygon の図形をオーバーレイする方法は以下のPostで書いた。

xyk.hatenablog.com

xyk.hatenablog.com

まずMapKitをインポートしておく。

import MapKit

MKCircle 領域内かを判定する

やり方はMKCircleからMKCircleRendererを作成して、renderer.path.containsメソッドで判定できる。

// 対象の座標
let location = CLLocationCoordinate2D(latitude: latitude, longitude: longitude)

// 半径100mの円領域
let center = CLLocationCoordinate2D(latitude: 35.6809591, longitude: 139.7673068)
let circle = MKCircle(center: center, radius: CLLocationDistance(100))
let renderer = MKCircleRenderer(circle: circle)

// 緯度経度(CLLocationCoordinate2D)をマップ上のポイント(MKMapPoint)に変換する
let mapPoint = MKMapPoint(location)
// マップ上のポイントを MKCircleRenderer 領域内のポイントに変換する
let rendererPoint = renderer.point(for: mapPoint)
if renderer.path.contains(rendererPoint) {
    // 含まれる
}

ちなみにMKCircleMKMapViewに実際に addOverlay していない状態でも判定可能。

マップ上でタップした地点が MKCircle 領域内かを判定する例

MKMapView に MKCircle を addOverlay することでマップ上に円図形がオーバーレイされる。

let circle = MKCircle(center: center, radius: radius)
mapView.addOverlay(circle)

タップジェスチャ登録。

let tapGesture = UITapGestureRecognizer(target: self, action: #selector(mapTapped(_:)))
mapView.addGestureRecognizer(tapGesture)

タップジェスチャ時に呼び出すメソッド。

@objc func mapTapped(_ sender: UITapGestureRecognizer) {
    if sender.state == .ended {
        let tapPoint = sender.location(in: mapView)
        let coord = mapView.convert(tapPoint, toCoordinateFrom: mapView)

        for case let circle as MKCircle in mapView.overlays { // 1つの MKCircle が追加されていることを想定
            let renderer = MKCircleRenderer(circle: circle)
            let mapPoint = MKMapPoint(coord)
            let rendererPoint = renderer.point(for: mapPoint)
            if renderer.path.contains(rendererPoint) {
                // 含まれる
            }
        }
    }
}

MKPolygon 領域内かを判定する

MKPolygonからMKPolygonRendererを作成して、renderer.path.containsメソッドで判定できる。

// 対象の座標
let location = CLLocationCoordinate2D(latitude: latitude, longitude: longitude)

// 四角形領域
var coordinates: [CLLocationCoordinate2D] = [coord1, coord2, coord3, coord4]
let polygon = MKPolygon(coordinates: &coordinates, count: coordinates.count)
let renderer = MKPolygonRenderer(polygon: polygon)

let mapPoint = MKMapPoint(location)
let rendererPoint = renderer.point(for: mapPoint)
if renderer.path.contains(rendererPoint) {
    // 含まれる
}

MKCircle、MKPolygon の Extension にする

extension MKCircle {

    func contains(_ coordinate: CLLocationCoordinate2D) -> Bool {
        let renderer = MKCircleRenderer(circle: self)
        let mapPoint = MKMapPoint(coordinate)
        let rendererPoint = renderer.point(for: mapPoint)
        return renderer.path.contains(rendererPoint)
    }
}

extension MKPolygon {

    func contains(_ coordinate: CLLocationCoordinate2D) -> Bool {
        let renderer = MKPolygonRenderer(polygon: self)
        let mapPoint = MKMapPoint(coordinate)
        let rendererPoint = renderer.point(for: mapPoint)
        return renderer.path.contains(rendererPoint)
    }
}

表示中のマップ(MKMapView)領域内に含まれている座標かどうかを判定する

検証環境:
Xcode 12
Swift 5.3

まずMapKitをインポートしておく。

import MapKit

MKMapRect を使う

ある座標が表示中のマップMKMapView領域内に含まれているかで判定する方法。
座標の緯度経度はCLLocationCoordinate2Dで扱っているとする。

  1. 表示中のマップ領域の矩形MKMapRectmapView.visibleMapRectで取得する。
  2. 緯度経度CLLocationCoordinate2Dをマップ座標系MKMapPointに変換する。
  3. MKMapRect#contains(_ point: MKMapPoint)メソッドで領域内の点であるかを判定する。
let mapRect = mapView.visibleMapRect
let mapPoint = MKMapPoint(coordinate)
if mapRect.contains(mapPoint) {
    // 領域内に含まれる
}

使用例: 表示中のマップ領域内に含まれるアノテーションのみ抽出する

let mapRect: MKMapRect = mapView.visibleMapRect
for annotation in mapView.annotations {
    let mapPoint = MKMapPoint(annotation.coordinate)
    if mapRect.contains(mapPoint) {
        // 領域内に含まれる
    }
}

MKCoordinateRegion を使う

ある座標がMKCoordinateRegion領域内に含まれているかで判定する方法。

func standardAngle(_ angle: CLLocationDegrees) -> CLLocationDegrees {
    let angle = angle.truncatingRemainder(dividingBy: 360)
    return angle < -180 ? -360 - angle : angle > 180 ? 360 - angle : angle
}

func regionContains(region: MKCoordinateRegion, location: CLLocationCoordinate2D) -> Bool {
    let deltaLat = abs(standardAngle(region.center.latitude - location.latitude))
    let deltaLon = abs(standardAngle(region.center.longitude - location.longitude))
    return region.span.latitudeDelta / 2 >= deltaLat && region.span.longitudeDelta / 2 >= deltaLon
}

使用例: 表示中のマップ領域内に含まれるアノテーションのみ抽出する

let region: MKCoordinateRegion = mapView.region
for annotation in mapView.annotations {
    if regionContains(region: region, location: annotation.coordinate) {
        // 領域内に含まれる
    }
}

MKCoordinateRegion の Extension にした場合。

extension MKCoordinateRegion {
    
    func contains(location: CLLocationCoordinate2D) -> Bool {
        let deltaLat = abs(standardAngle(center.latitude - location.latitude))
        let deltaLon = abs(standardAngle(center.longitude - location.longitude))
        return span.latitudeDelta / 2 >= deltaLat && span.longitudeDelta / 2 >= deltaLon
    }
    
    private func standardAngle(_ angle: CLLocationDegrees) -> CLLocationDegrees {
        let angle = angle.truncatingRemainder(dividingBy: 360)
        return angle < -180 ? -360 - angle : angle > 180 ? 360 - angle : angle
    }
}
if mapView.region.contains(location: coordinate) {
    // 領域内に含まれる
}

UIView 同士が重なっているかいないかを判定する方法

検証環境:
Xcode 12
Swift 5.3

UIView 同士が重なっているかいないかを判定する方法について。
CGRect#intersects(_:)メソッドで2つの CGRect が交差するかどうかを判定することができる。
UIView の Extension として以下のように追加した。

extension UIView {
    
    func overlaps(other view: UIView, in parent: UIView) -> Bool {
        let frame = self.convert(self.bounds, to: parent)
        let otherFrame = view.convert(view.bounds, to: parent)
        return frame.intersects(otherFrame)
    }
}

aView と bView が重なっているかを調べる。共に parentView のサブビューである。

if aView.overlaps(other: bView, in: parentView) {
    // 重なっている
}

MKMapView 上のタップした地点を中心にして正方形を描く

検証環境:
Xcode 12
Swift 5.3

f:id:xyk:20201111134019j:plain

前回は地図上(MKMapView)に円を描画したが、今回は正方形の矩形を描画してみる。

まずMapKitをインポートしておく。

import MapKit
  • MKMapView にUITapGestureRecognizerを追加してタップを検出する。
let tapGesture = UITapGestureRecognizer(target: self, action: #selector(mapTapped(_:)))
mapView.addGestureRecognizer(tapGesture)
  • この時呼び出すmapTappedメソッドを定義する。
    前回の円の場合はMKCircleだったが、今回はMKPolygonオブジェクトを作成してMKMapView#addOverlayで追加する。
    MKPolygon には4つの緯度経度を追加する。
@objc func mapTapped(_ sender: UITapGestureRecognizer) {
    if sender.state == .ended {
        let tapPoint = sender.location(in: mapView)
        // タップした座標(CGPoint)を緯度経度(CLLocationCoordinate2D)に変換する
        let center = mapView.convert(tapPoint, toCoordinateFrom: view)
        // 100m四方のRegionを作成
        let region = MKCoordinateRegion(center: center, latitudinalMeters: 100, longitudinalMeters: 100)
        
        // 4点の緯度経度を算出する
        let leftTop = CLLocationCoordinate2D(latitude: center.latitude - region.span.latitudeDelta / 2, longitude: center.longitude - region.span.longitudeDelta / 2)
        let rightTop = CLLocationCoordinate2D(latitude: center.latitude + region.span.latitudeDelta / 2, longitude: center.longitude - region.span.longitudeDelta / 2)
        let rightBottom = CLLocationCoordinate2D(latitude: center.latitude + region.span.latitudeDelta / 2, longitude: center.longitude + region.span.longitudeDelta / 2)
        let leftBottom = CLLocationCoordinate2D(latitude: center.latitude - region.span.latitudeDelta / 2, longitude: center.longitude + region.span.longitudeDelta / 2)
        
        var coordinates = [leftTop, rightTop, rightBottom, leftBottom]
        let polygon = MKPolygon(coordinates: &coordinates, count: coordinates.count)
        mapView.addOverlay(polygon)
    }
}

MKCoordinateSpan の latitudeDelta, longitudeDelta について。
latitudeDelta は対象マップ領域の北端と南端の緯度の差、
longitudeDelta は対象マップ領域の東端と西端の経度の差となる。
緯度の center の latitude から latitudeDelta / 2 北にずれれば表示範囲の北端が、南にずれれば表示範囲の南端が求まる。
経度についても同様。

  • MKMapViewDelegateデリゲートを使う準備
mapView.delegate = self
  • デリゲートメソッドmapView(_:rendererFor:)を実装して、MKPolygonオブジェクトを生成する。
    このデリゲートメソッドはMKMapView#addOverlayで追加された時に呼ばれる。
extension ViewController: MKMapViewDelegate {

    func mapView(_ mapView: MKMapView, rendererFor overlay: MKOverlay) -> MKOverlayRenderer {
        
        if let polygone = overlay as? MKPolygon {
            let renderer = MKPolygonRenderer(polygon: polygone)
            renderer.strokeColor = UIColor.red // 枠線の色
            renderer.fillColor = UIColor.red.withAlphaComponent(0.2) // 内側の色
            renderer.lineWidth = 2 // 枠線の太さ
            return renderer
        }
        
        return MKOverlayRenderer()
    }
}

MKMapView 上のタップした地点を中心にして円を描く

検証環境:
Xcode 12
Swift 5.3

f:id:xyk:20201110172554j:plain

地図上(MKMapView)に図形を描画するためにはMKOverlayプロトコルに適合したオブジェクトをMKMapView#addOverlayメソッドで追加する必要がある。

まずMapKitをインポートしておく。

import MapKit
  • MKMapView にUITapGestureRecognizerを追加してタップを検出する。
let tapGesture = UITapGestureRecognizer(target: self, action: #selector(mapTapped(_:)))
mapView.addGestureRecognizer(tapGesture)
  • この時呼び出すmapTappedメソッドを定義する。
    ここではタップ位置を中心としたMKCircleオブジェクトを作成してMKMapView#addOverlayで追加する。
@objc func mapTapped(_ sender: UITapGestureRecognizer) {
    if sender.state == .ended {
        let tapPoint = sender.location(in: mapView)
        // タップした座標(CGPoint)を緯度経度(CLLocationCoordinate2D)に変換する
        let center = mapView.convert(tapPoint, toCoordinateFrom: view)
        // 半径100m を指定
        let circle = MKCircle(center: center, radius: CLLocationDistance(100))
        mapView.addOverlay(circle)
    }
}
  • MKMapViewDelegateデリゲートを使う準備
mapView.delegate = self
  • デリゲートメソッドmapView(_:rendererFor:)を実装して、MKCircleRendererオブジェクトを生成する。
    このデリゲートメソッドはMKMapView#addOverlayで追加された時に呼ばれる。
extension ViewController: MKMapViewDelegate {

    func mapView(_ mapView: MKMapView, rendererFor overlay: MKOverlay) -> MKOverlayRenderer {
        
        if let circle = overlay as? MKCircle {
            let renderer = MKCircleRenderer(circle: circle)
            renderer.strokeColor = UIColor.red // 枠線の色
            renderer.fillColor = UIColor.red.withAlphaComponent(0.2) // 内側の色
            renderer.lineWidth = 2 // 枠線の太さ
            return renderer
        }
        
        return MKOverlayRenderer()
    }
}

Swift で UITextView のテキスト内のURLをリンク化する

検証環境:
Xcode 12
Swift 5.3

UITextView のテキスト内のURLをリンク化するには、isSelectableプロパティをtrue、そしてdataDetectorTypesプロパティに.linkを指定すればよい。
これでURL部分がリンク化され、リンクをタップすると Safari で開くようになる。

let textView = UITextView()
textView.text = "..."
textView.isEditable = false
textView.isSelectable = true
textView.dataDetectorTypes = [.link]

StoryBoard から設定する場合

f:id:xyk:20201104152854p:plain

表示例

f:id:xyk:20201104154843p:plain

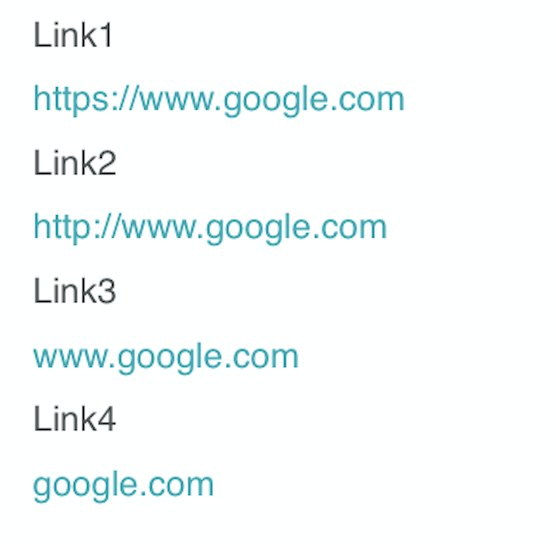
http スキームがなくてもリンクとして検出された。


URL ではない任意の文字列をリンク化したい場合は以前書いたような UITextView のattributedTextlinkTextAttributesプロパティを設定してリンク化する方法がある。

xyk.hatenablog.com


ちなみに UILabel では UITextView と同じようなやり方はできず、自前で実装する必要がある。
同様の機能を実装した OSS が公開されているので、これらの使用を検討するとよいかも。

github.com

github.com