xyk blog

最近は iOS 開発の記事が多めです。

Plain な UITableView で、Grouped っぽいデザインにする

検証環境:
Xcode 11.4
Swift 5.2

UITableView の style がデフォルトの Plain だけど、Grouped っぽいデザインにする方法。

  • Grouped だとデータがない空行は表示されないが、Plain だと表示される。
    これは tableView.tableFooterView に UIView を作って突っ込むと消える。
tableView.tableFooterView = UIView() // remove empty cells

ただし、tableFooterView を利用する場合は当然この方法はできない。

  • Grouped だと背景色がグレーだが、Plain だと白になっている。
    これは StoryBoard でのやり方だが、ViewController.view と TableView の Background Color にSystem Group Background Colorを設定する。

以上。

UICollectionViewCell で IBDesignable を使ったカスタムビューがリアルタイムプレビューに反映されない

検証環境:
Xcode 11.4
Swift 5.2

IBDesignable を使ったカスタムビューは StoryBoard 上に配置するとリアルタイムでデザインをプレビューすることができる。
しかし、UITableViewCell 上に配置したときはプレビューできるのに UICollectionViewCell 上にカスタムビューを配置したときのみ(UICollectionViewCell や UICollectionReusableView内)、プレビューに反映されないことがあった。
原因はカスタムビューの layoutSubviews にUIを更新するロジックを書いていたためで、layoutSubviewsはプレビュー時に必ず呼ばれるわけではなかった。(カスタムビューにさらにサブビューを追加するような場合は呼ばれる)
プレビュー時にはprepareForInterfaceBuilderが必ず呼ばれるので、こちらにUIを更新するロジックを書いておけばよい。

関連

xyk.hatenablog.com

Swift カメラアプリのサンプル

検証環境:
Xcode 11.4
Swift 5.2

Apple 公式の Swift で AVFoundation を用いて実装したカメラのサンプルアプリがあったのでメモ。

サンプルアプリ「AVCam Swift」

f:id:xyk:20200904120359p:plain

ダウンロードはこちら。

developer.apple.com

Oevrview
前面カメラと背面カメラの両方から写真と動画をキャプチャできます。デバイスによっては、カメラアプリは深度データの静止画キャプチャ、ポートレートエフェクトマット、ライブフォトもサポートしています。
このサンプルコードプロジェクトAVCamは、これらのキャプチャ機能を独自のカメラアプリに実装する方法を示しています。内蔵のフロントおよびリアiPhoneおよびiPadカメラの基本機能を活用します。

注意
AVCamを使用するには、iOS 13以降を実行しているiOSバイスが必要です。Xcodeはデバイスのカメラにアクセスできないため、このサンプルはシミュレーターでは機能しません。AVCamは、iPhone 7 Plusポートレートエフェクトマット配信など、現在のデバイスがサポートしていないモードのボタンを非表示にします。

PhotoKit のサンプル

検証環境:
Xcode 11.4
Swift 5.2

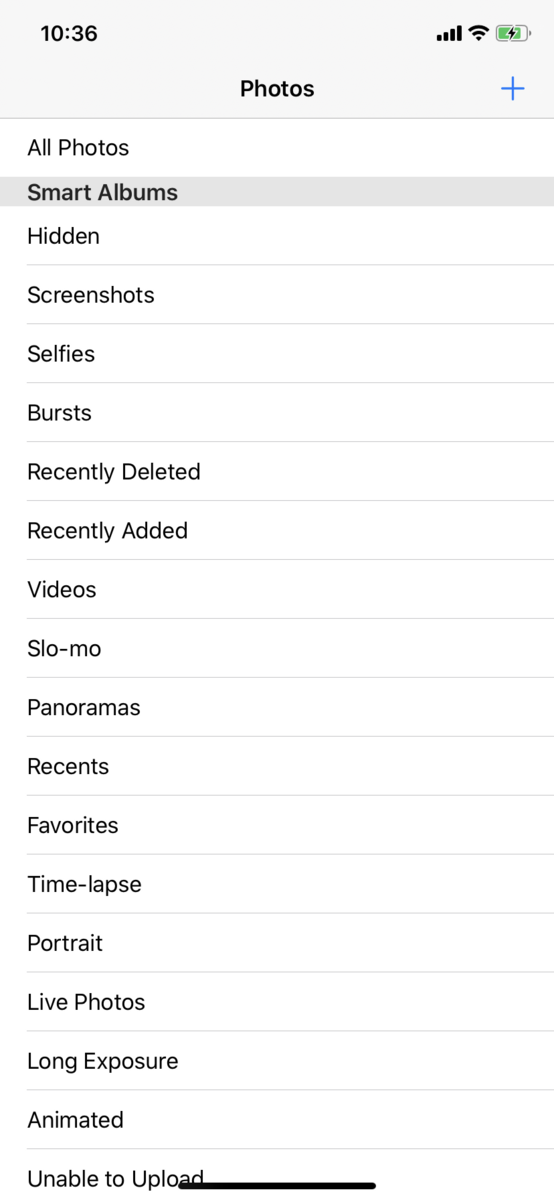
画像選択UI としては標準で用意されている UIImagePickerController を使えば簡単に実装できるが、複数選択などカスタマイズする場合は PhotoKit を使って自分で実装する必要がある。
(※ 追記: iOS14から追加された PHPickerViewController で複数画像選択ができるようになった。)
Apple 公式の PhotoKit を使った画像選択UIのサンプルコードがあり、それが参考になったのでメモ。

サンプルアプリ「PhotoBrowse」

f:id:xyk:20200904104857p:plain

以下からダウンロードできる。
2つとも同じアプリで上の方が新しいのでこちらをダウンロードすればOK。

Browsing and Modifying Photo Albums
developer.apple.com

developer.apple.com

Xcode のデバッグ時に `error: Couldn't IRGen expression, no additional error` が発生

検証環境:
Xcode 11.4
Swift 5.2

ちょっとどのタイミングででそうなったのか、把握できていないんだけど、Xcodeブレークポイントで止めて、po コマンドで出力しようとしたら error: Couldn't IRGen expression, no additional error が発生して出力できなくなった。
Carthage ディレクトリを削除し、Carthage の再ビルドを行ったところ解消した。

$ carthage bootstrap --platform iOS --no-use-binaries --cache-builds --new-resolver

UIImageView の画像に AspectFit を適用した後の画像サイズを知る方法

検証環境:
Xcode 11.4
Swift 5.2

UIImageView の画像に AspectFit を適用した後の画像サイズは、AVFoundation の AVMakeRect(aspectRatio:insideRect:) を使うと自分で計算せずに簡単にサイズを知ることができます。

UIImageView の Extension として実装してみました。

import AVFoundation

extension UIImageView {
    
    var imageSize: CGSize {
        if let image = image {
            return AVMakeRect(aspectRatio: image.size, insideRect: bounds).size
        }
        return .zero
    }
}

https://developer.apple.com/documentation/avfoundation/1390116-avmakerect

Swift で UIView を穴を開ける

検証環境:
Xcode 11.4
Swift 5.2

Swift で UIView の穴を開ける実装を Playground で試してみます。
今回のサンプルはまず画像を配置し、その上に UIView を被せます。
被せた UView の内部に穴を開けることで下の画像が見えるようにします。
また、ついでに画像上に三分割法のグリッドと、枠線も入れてみます。

f:id:xyk:20200820173543p:plain

サンプルコード

import UIKit
import PlaygroundSupport

class CutoutView: UIView {
    
    let cutoutLayer: CALayer = {
        let cutoutLayer = CALayer()
        cutoutLayer.backgroundColor = UIColor.gray.cgColor
        cutoutLayer.opacity = 0.5
        return cutoutLayer
    }()
    
    let maskLayer = CAShapeLayer()
    
    let borderLayer: CAShapeLayer = {
        let shapeLayer = CAShapeLayer()
        shapeLayer.lineWidth = 2
        shapeLayer.strokeColor = UIColor.white.cgColor
        shapeLayer.fillColor = UIColor.clear.cgColor
        return shapeLayer
    }()
    
    let gridLayer: CAShapeLayer = {
        let shapeLayer = CAShapeLayer()
        shapeLayer.lineWidth = 0.5
        shapeLayer.strokeColor = UIColor.white.cgColor
        return shapeLayer
    }()

    var cutoutPath: UIBezierPath?

    override init(frame: CGRect) {
        super.init(frame: frame)
        
        layer.backgroundColor = UIColor.clear.cgColor
        
        layer.addSublayer(cutoutLayer)
        layer.addSublayer(borderLayer)
        layer.addSublayer(gridLayer)
    }
    
    required init?(coder: NSCoder) {
        fatalError("init(coder:) has not been implemented")
    }
    
    override func layoutSubviews() {
        super.layoutSubviews()
        
        updateLayer()
    }
    
    private func updateLayer() {
        
        let maskPath = UIBezierPath(rect: bounds)
        
        // くり抜くサイズを指定。今回は比率 16:9 の矩形にする
        let width = bounds.insetBy(dx: 16, dy: 0).width
        let height = width * (9 / 16)
        let x = bounds.midX - width / 2
        let y = bounds.midY - height / 2
        let cutoutRect = CGRect(x: x, y: y, width: width, height: height)
        let cutoutPath = UIBezierPath(rect: cutoutRect)
        maskPath.append(cutoutPath)
        
        maskLayer.fillRule = .evenOdd
        maskLayer.path = maskPath.cgPath
        
        cutoutLayer.frame = bounds
        cutoutLayer.mask = maskLayer
        
        borderLayer.path = cutoutPath.cgPath
        
        addGridPath(x: x, y: y, width: width, height: height)

        self.cutoutPath = cutoutPath
    }
    
    private func addGridPath(x: CGFloat, y: CGFloat, width: CGFloat, height: CGFloat) {
        let gridPath = UIBezierPath()
        
        gridPath.move(to: .init(x: x + (width * 0.33), y: y))
        gridPath.addLine(to: .init(x: x + (width * 0.33), y: y + height))

        gridPath.move(to: .init(x: x + (width * 0.66), y: y))
        gridPath.addLine(to: .init(x: x + (width * 0.66), y: y + height))
        
        gridPath.move(to: .init(x: x, y: y + (height * 0.33)))
        gridPath.addLine(to: .init(x: x + width, y: y + (height * 0.33)))
        
        gridPath.move(to: .init(x: x, y: y + (height * 0.66)))
        gridPath.addLine(to: .init(x: x + width, y: y + (height * 0.66)))
        
        gridLayer.path = gridPath.cgPath
    }

    override func hitTest(_ point: CGPoint, with event: UIEvent?) -> UIView? {
        if let cutoutPath = cutoutPath, cutoutPath.contains(point) {
            return nil
        }
        return bounds.contains(point) ? self : nil
    }
}

class MyViewController: UIViewController {
    
    override func viewDidLoad() {
        super.viewDidLoad()
        
        view.backgroundColor = .systemTeal
        
        addImageView()
        addCutoutView()
    }
    
    private func addImageView() {
        let image = UIImage(named: "0.jpg")!
        let imageView = UIImageView(image: image)
        imageView.contentMode = .scaleAspectFit
        view.addSubview(imageView)
        imageView.translatesAutoresizingMaskIntoConstraints = false
        NSLayoutConstraint.activate([
            imageView.centerXAnchor.constraint(equalTo: view.centerXAnchor),
            imageView.centerYAnchor.constraint(equalTo: view.centerYAnchor),
            imageView.widthAnchor.constraint(equalToConstant: 300),
            imageView.heightAnchor.constraint(equalToConstant: 300),
        ])
    }
    
    private func addCutoutView() {
        let cView = CutoutView()
        view.addSubview(cView)
        cView.translatesAutoresizingMaskIntoConstraints = false
        NSLayoutConstraint.activate([
            cView.centerXAnchor.constraint(equalTo: view.centerXAnchor),
            cView.centerYAnchor.constraint(equalTo: view.centerYAnchor),
            cView.widthAnchor.constraint(equalToConstant: 300),
            cView.heightAnchor.constraint(equalToConstant: 300),
        ])
    }
}

PlaygroundPage.current.liveView = MyViewController()

マスク用の CAShapeLayer の fillRule は .evenOdd にします。
これにより穴の開いた矩形を作ることができます。

今回は穴を開けた部分にグリッドを追加しますが、Root layer をマスクすると子 layer すべてが影響を受け、マスクされてしまうので、穴を開けた layer は別 layer として Root layer に追加しています。

hitTest メソッドをオーバーライドし、穴が空いた部分のタッチイベントは nil を返すようにして、下のビューにタッチイベントをスルーしています。

参考:

Shape Fill Mode Values
https://developer.apple.com/documentation/quartzcore/cashapelayer/shape_fill_mode_values

Swift で UIImagePickerController を使って写真を読み込む

検証環境:
Xcode 11.4
Swift 5.2

Swift で UIImagePickerController を使って写真を読み込むための最小コードサンプルです。

import UIKit

class ViewController: UIViewController {
    
    override func viewDidLoad() {
        super.viewDidLoad()
    }
    
    @IBAction func handleButton(_ sender: UIButton) {
        
        guard UIImagePickerController.isSourceTypeAvailable(.photoLibrary) else {
            return
        }
        
        let picker = UIImagePickerController()
        picker.sourceType = .photoLibrary // 他に .camera, .savedPhotosAlbum がある
        picker.delegate = self
        //picker.allowsEditing = true // 写真選択後に正方形にクロップする編集画面に遷移するか
        present(picker, animated: true)
    }
}

extension ViewController: UIImagePickerControllerDelegate & UINavigationControllerDelegate {
    
    func imagePickerController(_ picker: UIImagePickerController,
                               didFinishPickingMediaWithInfo info: [UIImagePickerController.InfoKey: Any]) {
        print("didFinishPickingMediaWithInfo. ", info)
        
        picker.dismiss(animated: true) {
            if let image = info[.originalImage] as? UIImage {
                // do stuff
            }
        }
    }
    
    func imagePickerControllerDidCancel(_ picker: UIImagePickerController) {
        print("imagePickerControllerDidCancel.")
        picker.dismiss(animated: true)
    }
}

Info.plist への権限追加については、UIImagePickerController によるフォトライブラリからの読み込みのみの場合は特に不要なようです。

Note
When using the UIImagePickerController to bring up the user's photo library, your app doesn't need to request permission explicitly.

https://developer.apple.com/documentation/photokit/requesting_authorization_to_access_photos

UITextField, UITextView 編集時にキーボードで隠れないようにする - Swift Protocol Extension 版

検証環境:
Xcode 11.6
Swift 5.2.4

以前にも同様の記事を書いていますが、UITextField, UITextView を UIScrollView (やそのサブクラス、UICollectionView ・UITableView など)上に配置して、contentInset を変化させることでキーボードで隠れないようにします。
今回はコード共通化のため Swift Protocol Extension を使って切り出し、使い回せるようにしました。
Protocol Extension 内で Selector を使用するためにちょっとした工夫をしていますが、その辺りは前回の記事で詳しく書いてます。

Helper

UITextField, UITextView を探す UIView Extension

extension UIView {
    func findFirstResponder() -> UIView? {
        if isFirstResponder {
            return self
        }
        for v in subviews {
            if let responder = v.findFirstResponder() {
                return responder
            }
        }
        return nil
    }
}

Keyboard の Notification.userInfo をマッピングする Struct

struct UIKeyboardInfo {
    let frame: CGRect
    let animationDuration: TimeInterval
    let animationCurve: UIView.AnimationOptions
    
    init?(info: [AnyHashable : Any]) {
        guard
            let frame = (info[UIResponder.keyboardFrameEndUserInfoKey] as? NSValue)?.cgRectValue,
            let duration = info[UIResponder.keyboardAnimationDurationUserInfoKey] as? TimeInterval,
            let curve = info[UIResponder.keyboardAnimationCurveUserInfoKey] as? UInt
            else { return nil }
        self.frame = frame
        animationDuration = duration
        animationCurve = UIView.AnimationOptions(rawValue: curve)
    }
}

NotificationCenter の引数に渡す Observer 用クラス

class NotificationObserver {
    
    let closure: (_ notification: Notification) -> Void

    init(closure: @escaping (_ notification: Notification) -> Void) {
        self.closure = closure
    }

    @objc func invoke(_ notification: Notification) {
        closure(notification)
    }
}

Protocol Extension

キーボードの表示・非表示に合わせて UIScrollView.contentInset を変化させる Protocol Extension

fileprivate var keyboardDetectorShowKey: UInt8 = 0
fileprivate var keyboardDetectorHideKey: UInt8 = 0

protocol KeyboardDetector {
    var scrollView: UIScrollView! { get }
}

extension KeyboardDetector where Self: UIViewController {
    
    func startObservingKeyboardChanges() {
        
        let observerShow = NotificationObserver { [weak self] notification in
            self?.onKeyboardWillShow(notification)
        }
        
        NotificationCenter.default.addObserver(
            observerShow,
            selector: #selector(NotificationObserver.invoke(_:)),
            name: UIResponder.keyboardWillShowNotification,
            object: nil)
        
        objc_setAssociatedObject(
            self,
            &keyboardDetectorShowKey,
            observerShow,
            .OBJC_ASSOCIATION_RETAIN)
        
        let observerHide = NotificationObserver { [weak self] _ in
            self?.onKeyboardWillHide()
        }
        
        NotificationCenter.default.addObserver(
            observerHide,
            selector: #selector(NotificationObserver.invoke(_:)),
            name: UIResponder.keyboardWillHideNotification,
            object: nil)
        
        objc_setAssociatedObject(
            self,
            &keyboardDetectorHideKey,
            observerHide,
            .OBJC_ASSOCIATION_RETAIN)
    }
    
    func stopObservingKeyboardChanges() {
        
        if let observerShow = objc_getAssociatedObject(
            self, &keyboardDetectorShowKey) as? NotificationObserver {
            NotificationCenter.default.removeObserver(
                observerShow, name: UIResponder.keyboardWillShowNotification, object: nil)
        }
        if let observerHide = objc_getAssociatedObject(
            self, &keyboardDetectorHideKey) as? NotificationObserver {
            NotificationCenter.default.removeObserver(
                observerHide, name: UIResponder.keyboardWillHideNotification, object: nil)
        }
    }
    
    private func onKeyboardWillShow(_ notification: Notification) {
        guard
            let userInfo = notification.userInfo,
            let keyboardInfo = UIKeyboardInfo(info: userInfo),
            let inputView = view.findFirstResponder()
            else { return }

        let inputRect = inputView.convert(inputView.bounds, to: scrollView)
        let keyboardRect = scrollView.convert(keyboardInfo.frame, from: nil)
        let offsetY = inputRect.maxY - keyboardRect.minY
        if offsetY > 0 {
            let contentOffset = CGPoint(x: scrollView.contentOffset.x,
                                        y: scrollView.contentOffset.y + offsetY)
            scrollView.contentOffset = contentOffset
        }
        let contentInset = UIEdgeInsets(top: 0,
                                        left: 0,
                                        bottom: keyboardInfo.frame.height - view.safeAreaInsets.bottom,
                                        right: 0)
        scrollView.contentInset = contentInset
        scrollView.scrollIndicatorInsets = contentInset
    }
    
    private func onKeyboardWillHide() {
        scrollView.contentInset = .zero
        scrollView.scrollIndicatorInsets = .zero
    }
}

使用方法

ViewController に KeyboardDetector プロトコルを適合させる

class ViewController: UIViewController, KeyboardDetector {
    
    override func viewWillAppear(_ animated: Bool) {
        super.viewWillAppear(animated)
        
        startObservingKeyboardChanges()
    }
    
    override func viewWillDisappear(_ animated: Bool) {
        stopObservingKeyboardChanges()
        
        super.viewWillDisappear(animated)
    }
    
    @IBOutlet weak var scrollView: UIScrollView!
}

通知解除はiOS 9.0以降で不要になりましたが、通知登録した画面が複数表示されている(UINavigationController#pushやUIViewController#presentなどでViewControlerがStackされている)場合はViewControllerが破棄されるまでは解除されず、すべての画面で反応してしまうので、上記のように画面が非表示になるタイミングで通知解除を明示的に行います。

xyk.hatenablog.com

xyk.hatenablog.com

Swift の Protocol Extension 内で Selector を呼び出す

検証環境:
Xcode 11.6
Swift 5.2.4

Swift の Protocol Extension 内では @objc をつけたメソッドを実装しても #selector で呼び出しすることはできません。

例えば以下のコードでは NotificationCenter の引数で selector を指定しています。

protocol KeyboardDetector {}

extension KeyboardDetector where Self: UIViewController {
    
    func startObservingKeyboardChanges() {
        
        NotificationCenter.default.addObserver(
            self,
            selector: #selector(onKeyboardWillShow(_:)),
            name: UIResponder.keyboardWillShowNotification,
            object: nil)
    }
    
    @objc func onKeyboardWillShow(_ notification: Notification) {
        // do stuff
    }
}

しかし selector を指定する部分で、

Argument of '#selector' refers to instance method 'onKeyboardWillShow' that is not exposed to Objective-C

というエラーが、また @objc のメソッド定義部分にも

@objc can only be used with members of classes, @objc protocols, and concrete extensions of classes

というエラーになってしまいます。
どうやら Protocol Extension 機能は Objective-C からは見えないようです。

なんとか使うことはできないのかとググってみたところ、Objective-C の Associated Objects を使って実装する方法があったので、ちょっと強引ですがそれで実装してみます。

Swift の Protocol Extension 内で Selector を呼び出す

まず NotificationCenter の引数に渡す Observer 用クラスを作ります。
@objc メソッドはこの中に定義し、実際の処理は外部からクロージャで渡すようにします。

class NotificationObserver {
    
    let closure: (_ notification: Notification) -> Void

    init(closure: @escaping (_ notification: Notification) -> Void) {
        self.closure = closure
    }

    @objc func invoke(_ notification: Notification) {
        closure(notification)
    }
}

通常 NotificationCenter の Observer には self (UIViewController) を渡すところですが、今回は @objc メソッドを定義した NotificationObserver クラスのインスタンスを関数スコープ内で生成し、NotificationCenter の Observer として渡します。

このままだと Observer インスタンスが関数終了時に消滅してしまいますが、これを回避するために、objc_setAssociatedObject を使って保持するようにします。

protocol KeyboardDetector {}

extension KeyboardDetector where Self: UIViewController {
    
    func startObservingKeyboardChanges() {
        
        let observer = NotificationObserver { [weak self] notification in
            self?.onKeyboardWillShow(notification)
        }
        
        NotificationCenter.default.addObserver(
            observer,
            selector: #selector(NotificationObserver.invoke(_:)),
            name: UIResponder.keyboardWillShowNotification,
            object: nil)
        
        objc_setAssociatedObject(
            self,
            "[\(arc4random())]",
            observer,
            .OBJC_ASSOCIATION_RETAIN)
    }
    
    func onKeyboardWillShow(_ notification: Notification) {
        // do stuff
    }
}

以下が参考にした記事です。
こちらでは UIControl の addTarget メソッドの引数に渡す selector の例です。

stackoverflow.com

blog.natanrolnik.me